

SSO is available on the Custom plan. After completing the Okta setup, contact Subframe to enable it for your team.
1
Create an app integration
Open Applications in the Okta admin console and click Create App Integration.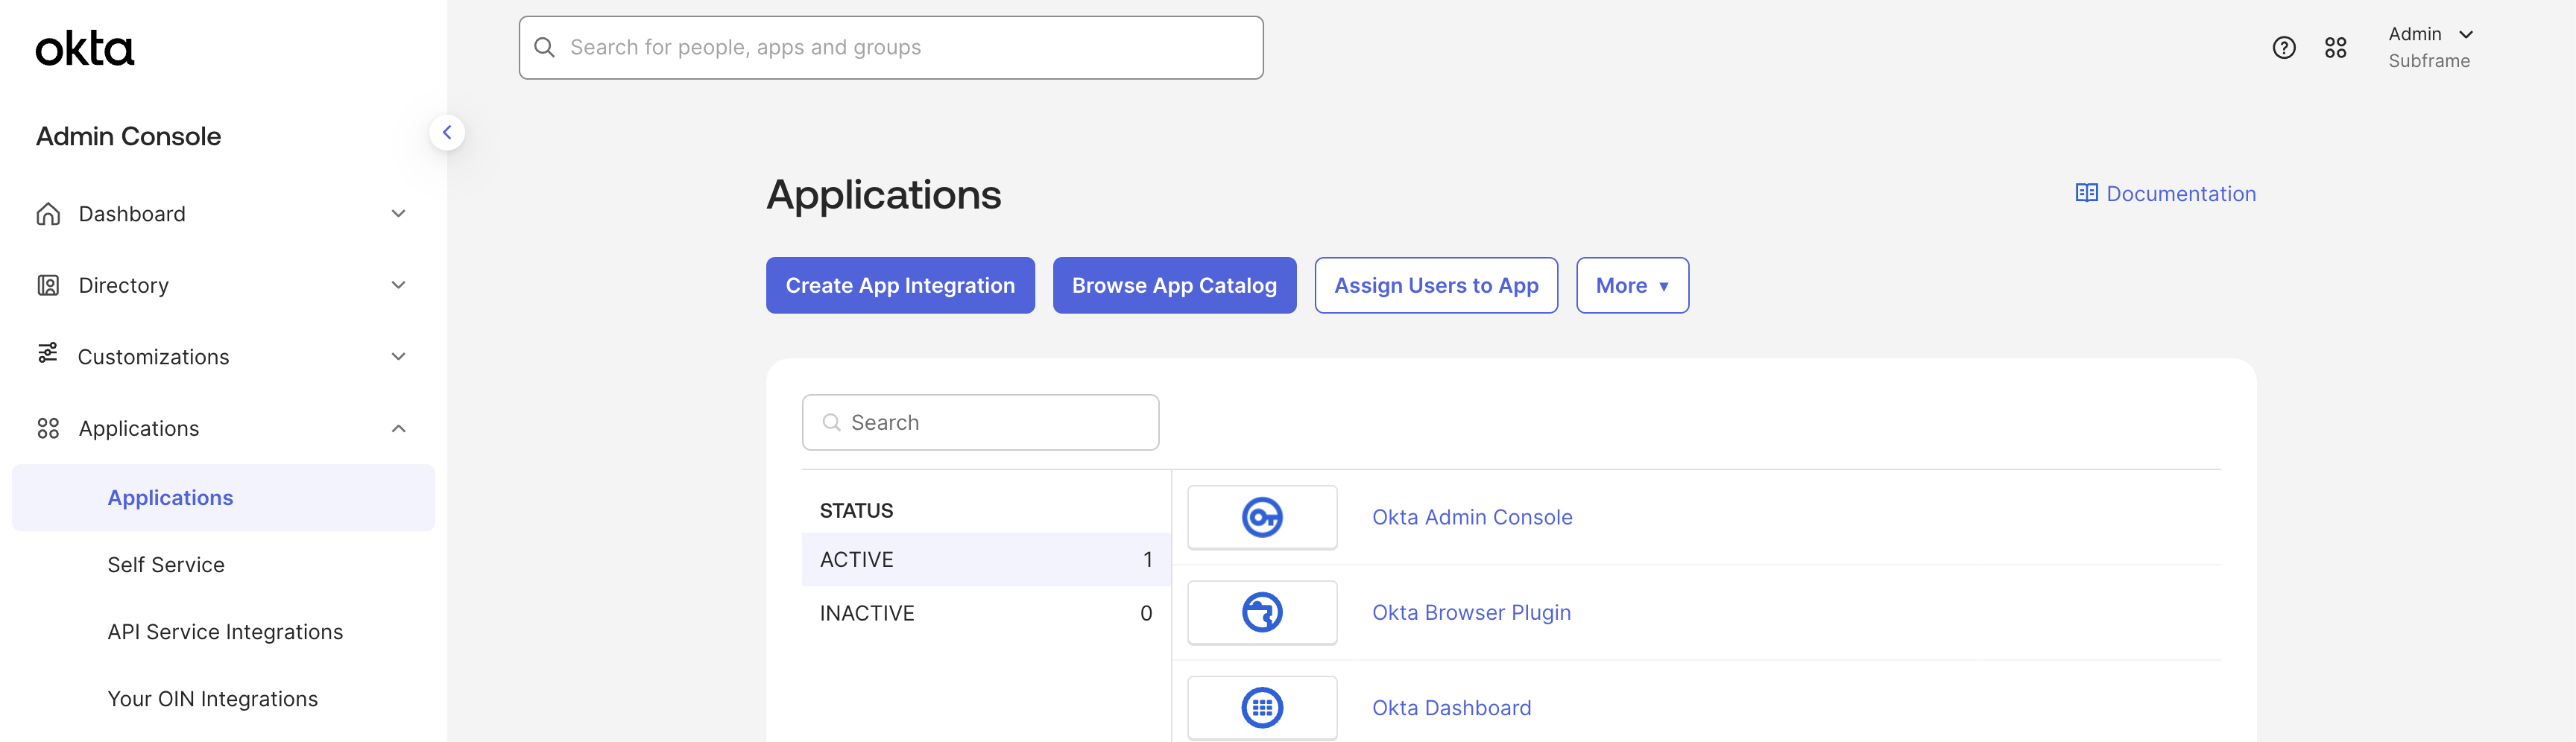
2
Select SAML 2.0
Select SAML 2.0, then continue.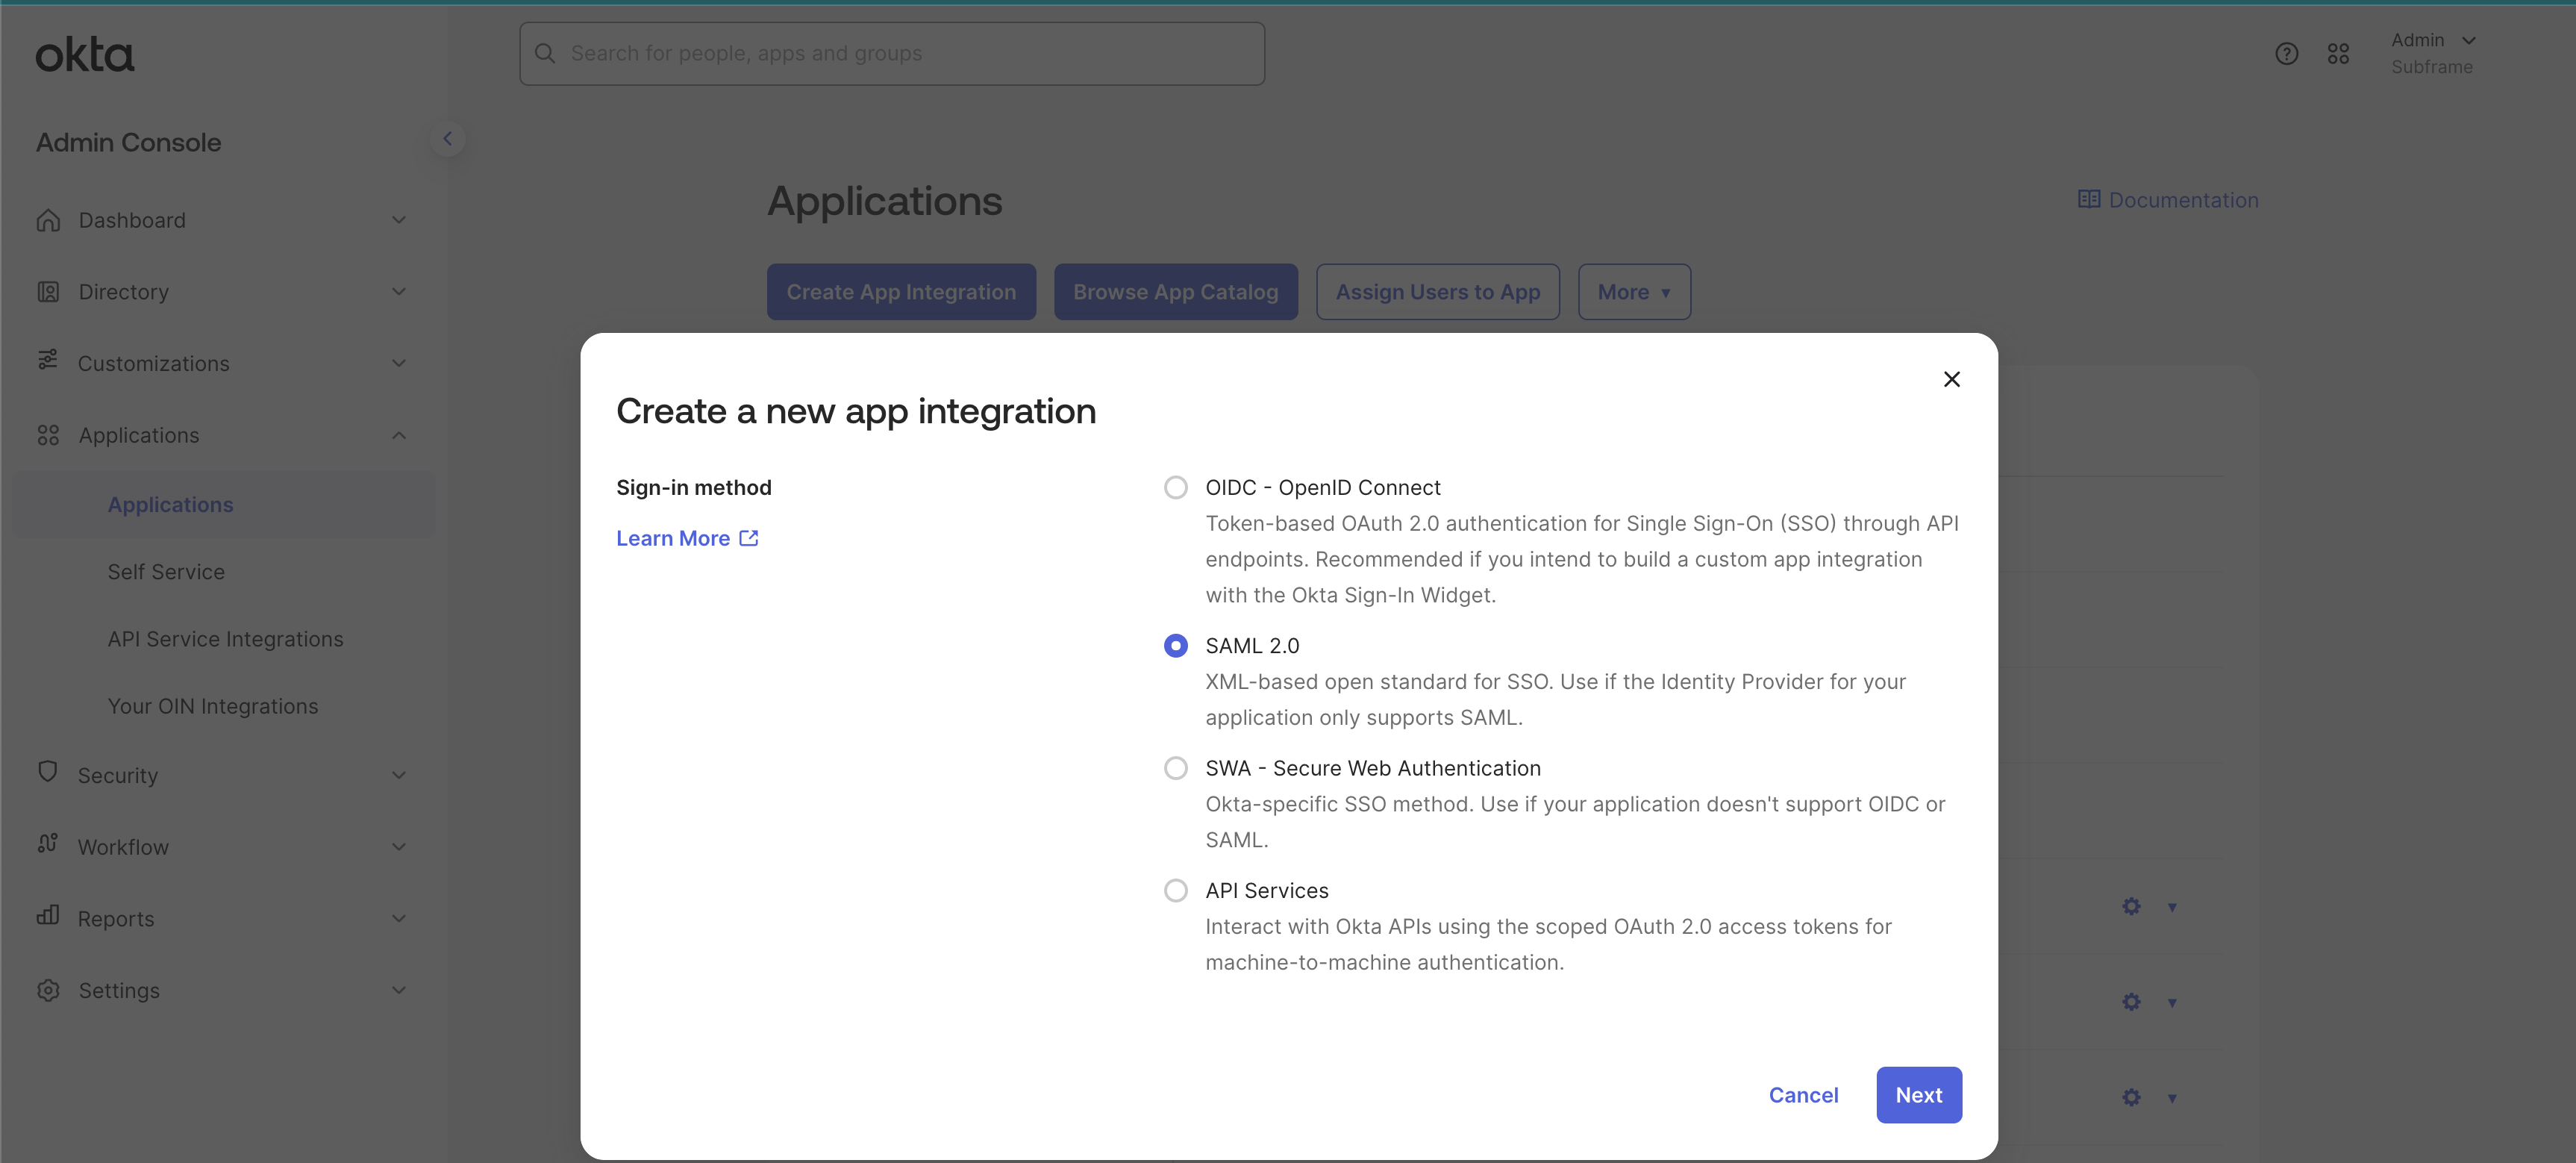
3
Enter the app details
Name the app Subframe. You can also download and upload the Subframe logo below.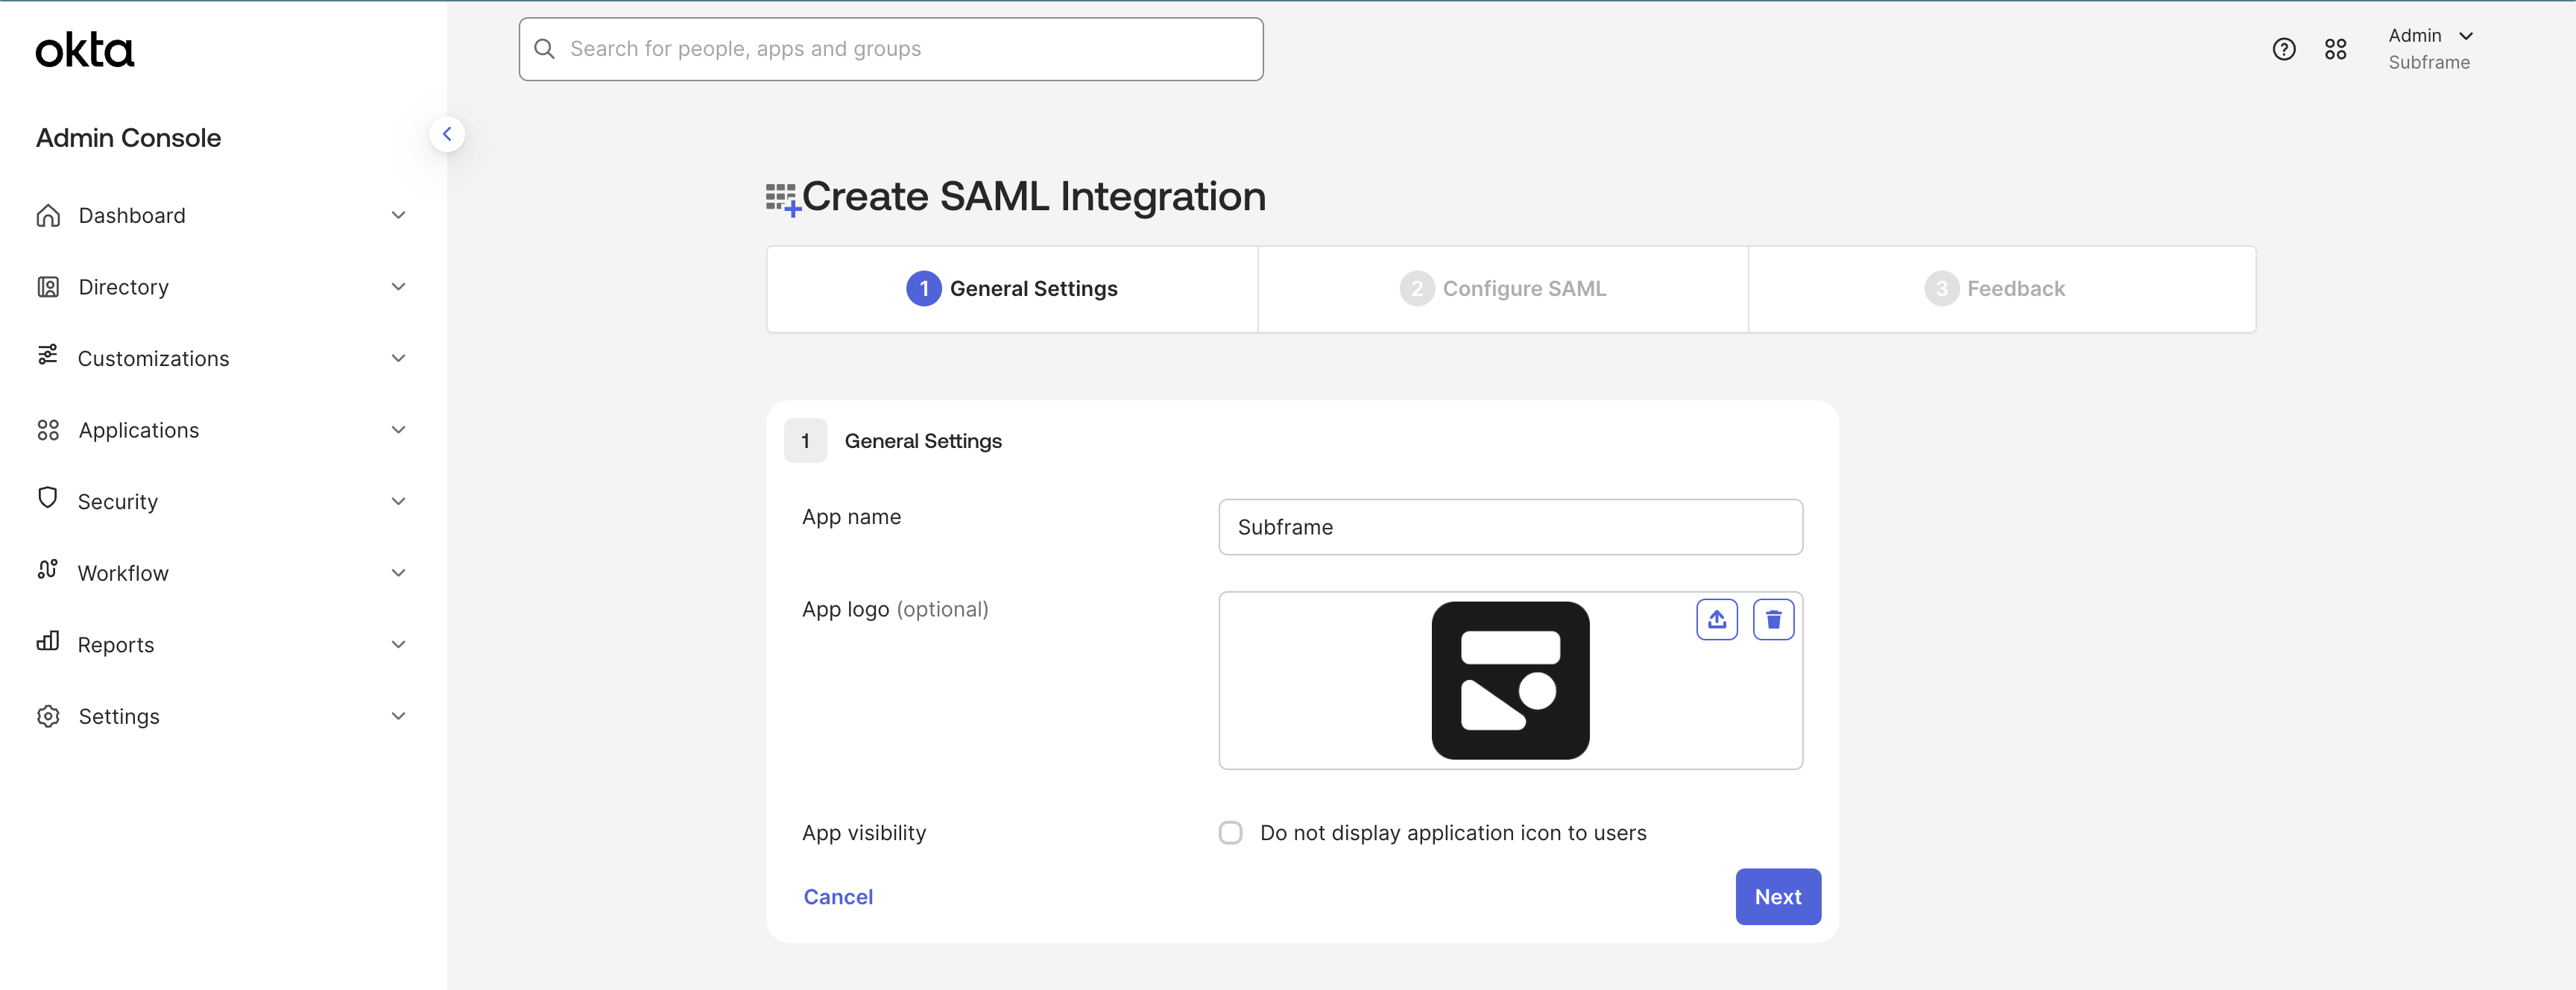

4
Configure SAML
Enter these values exactly: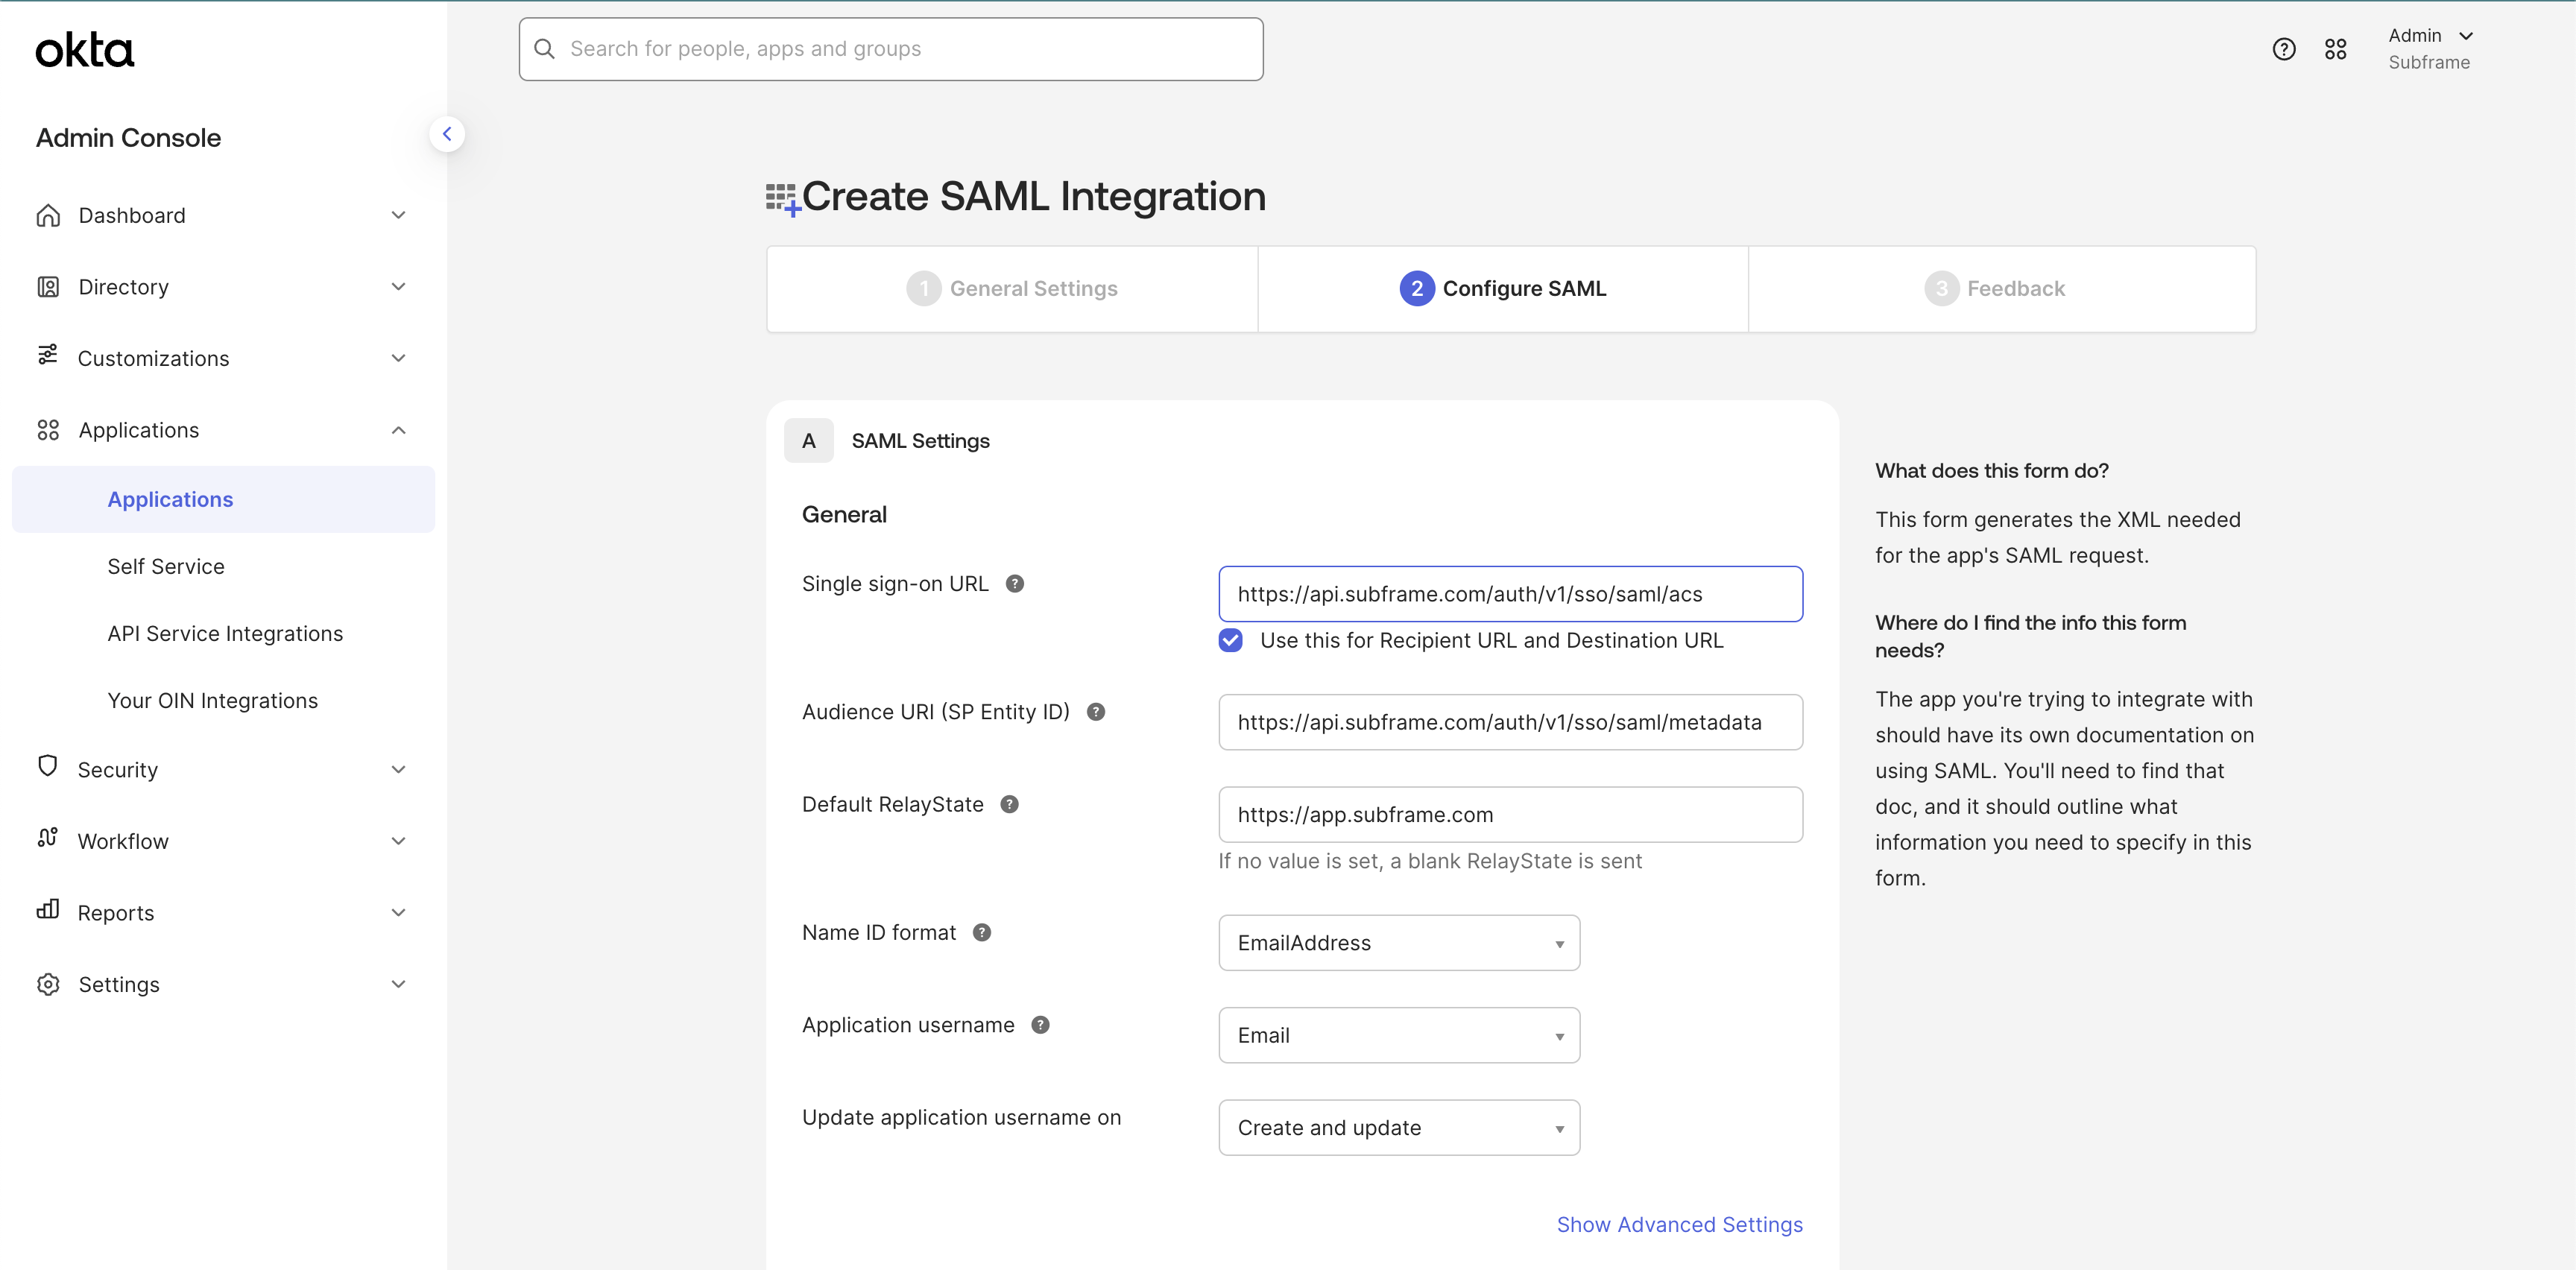
5
Add the email attribute
Add an attribute statement that maps 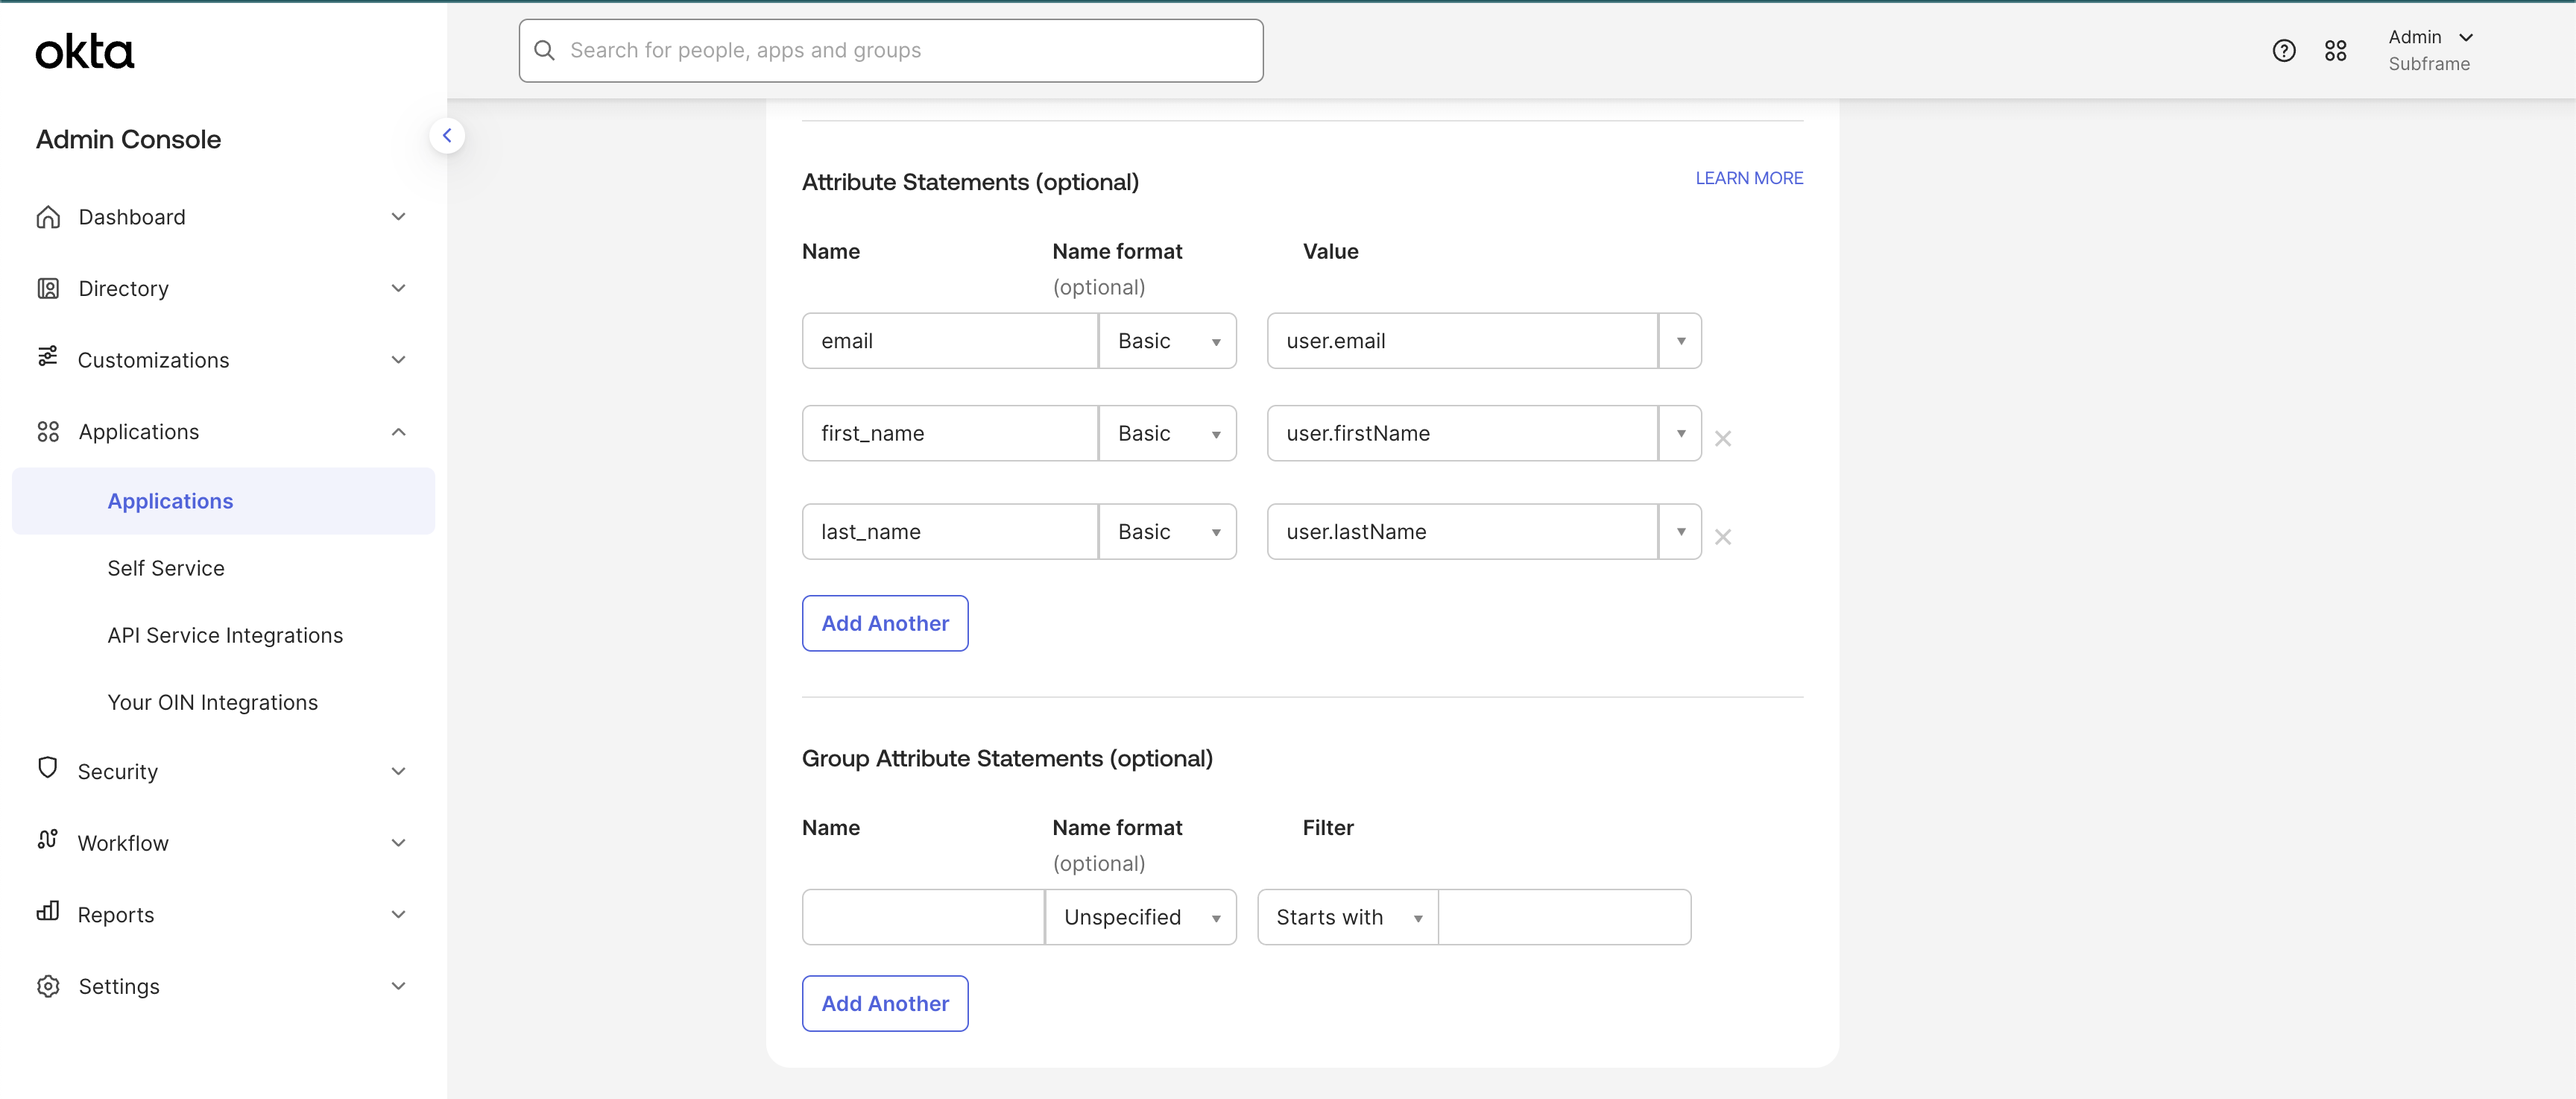
email to user.email. Other mappings are optional.6
Send your metadata URL to Subframe
Finish creating the app, then copy its Metadata URL and send it to your Subframe contact or support@subframe.com.The URL usually follows this format: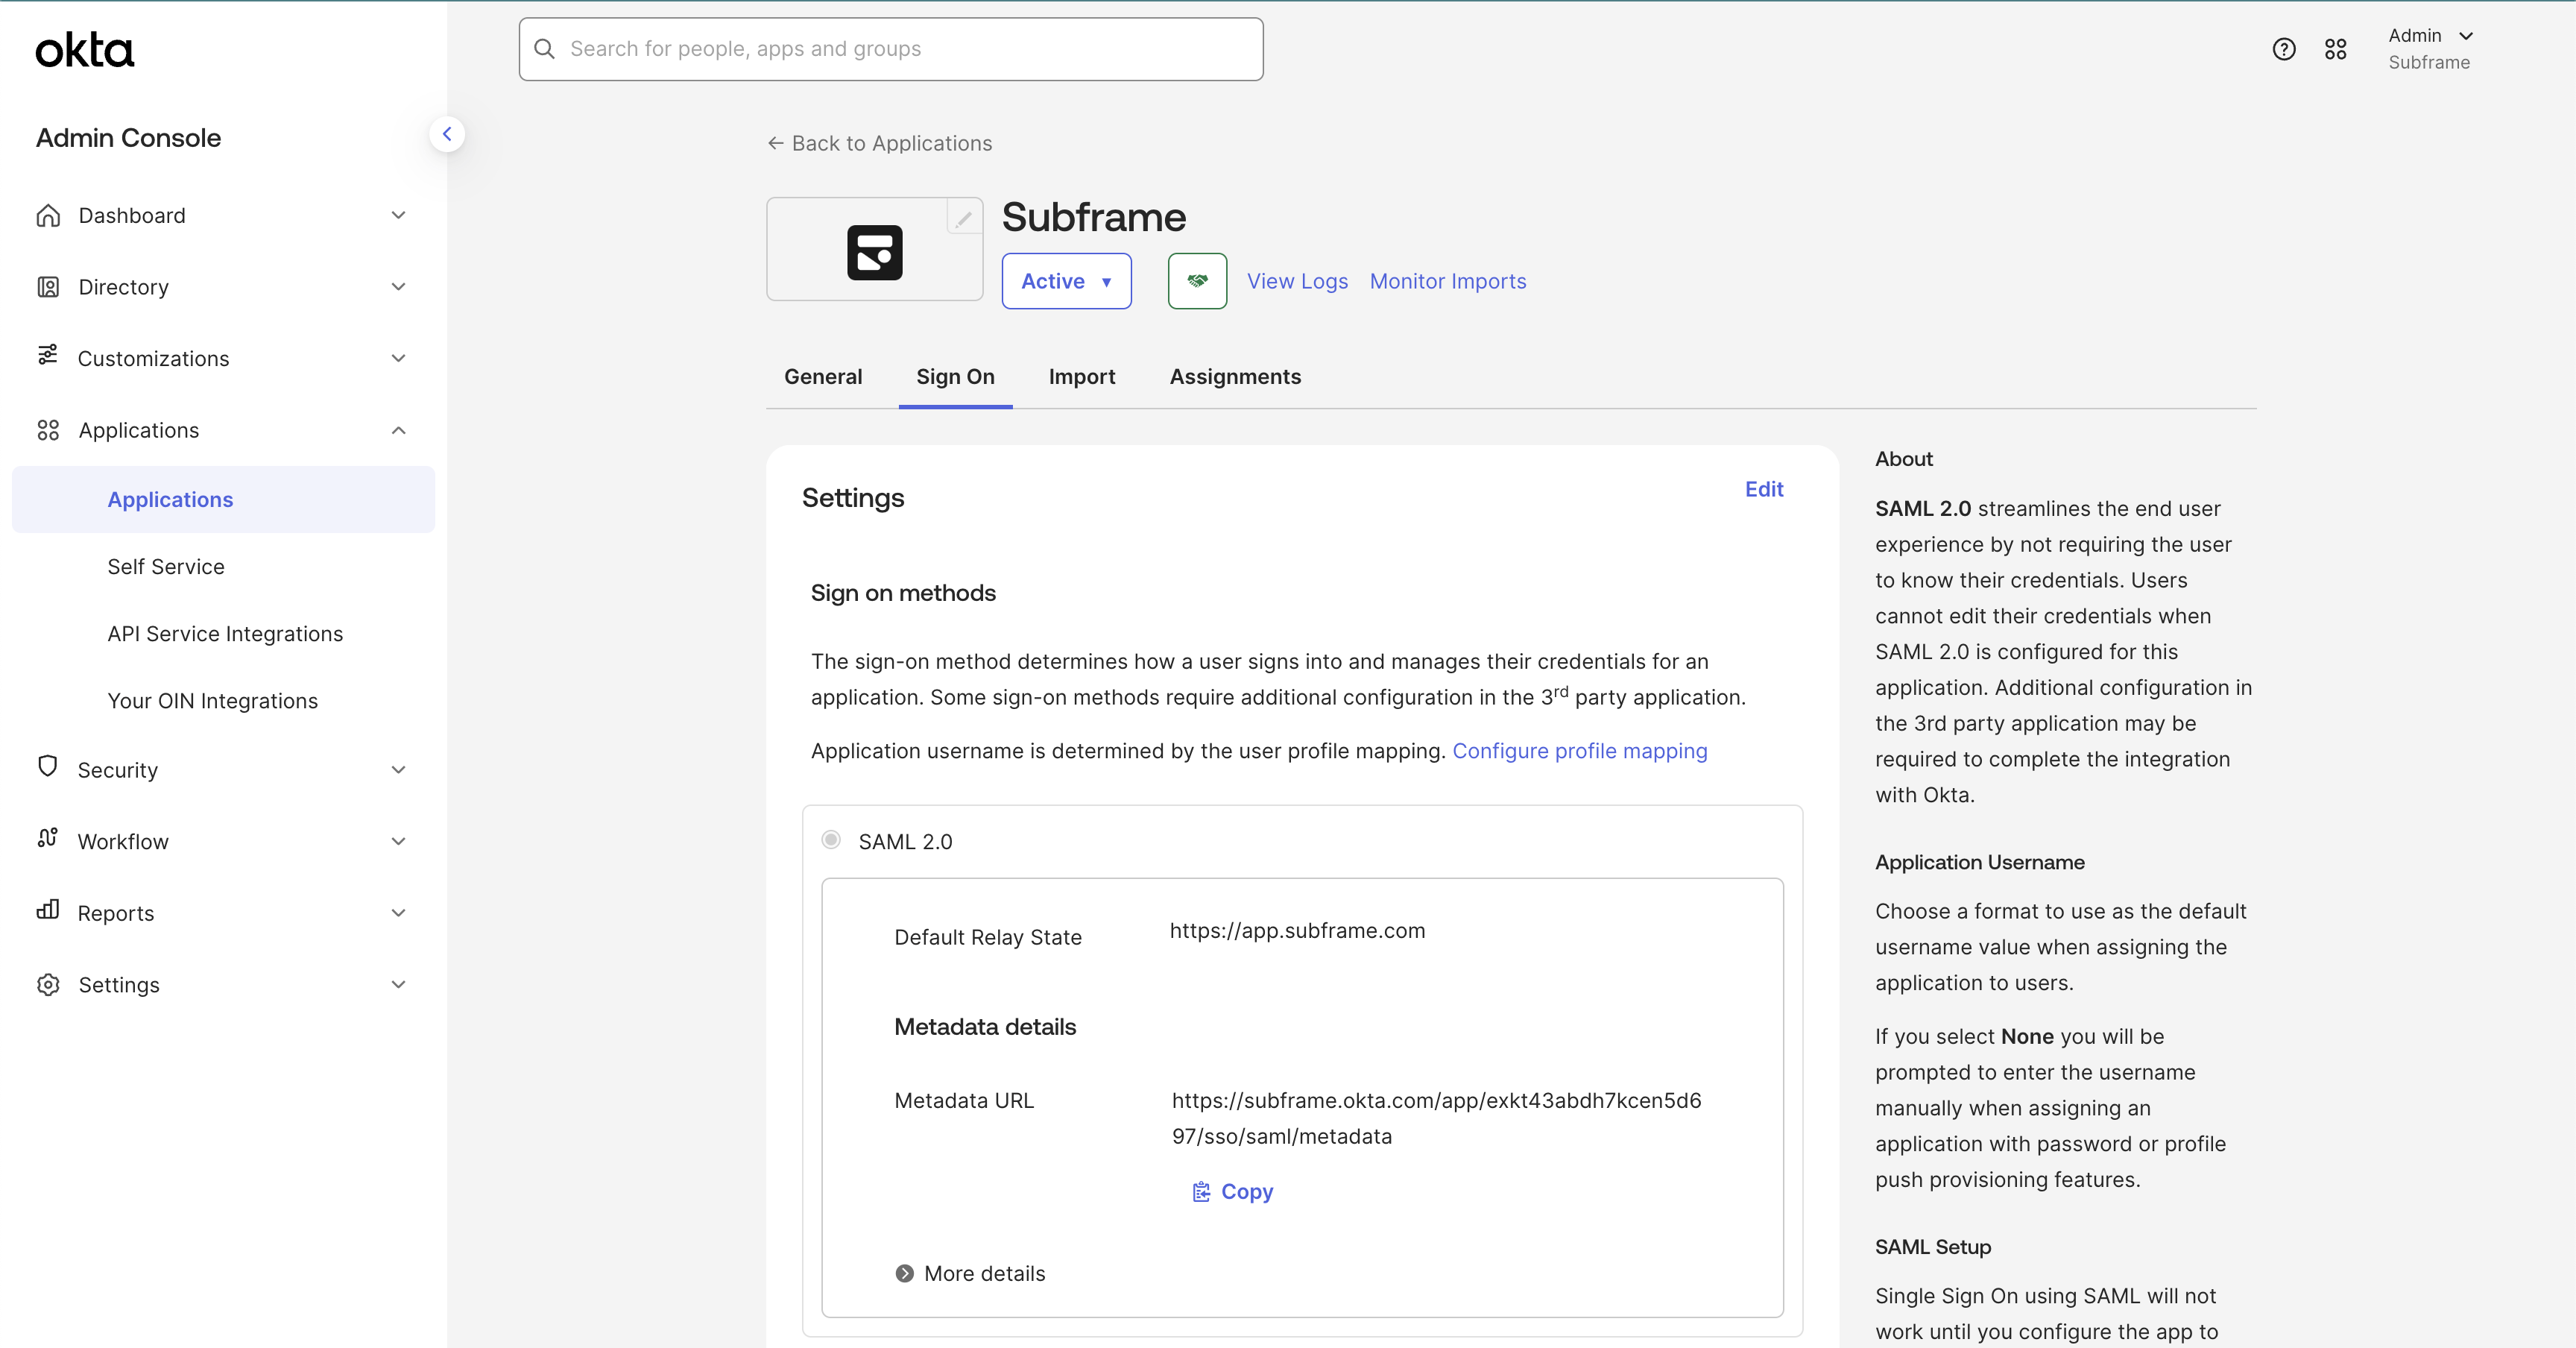
7
Test single sign-on
Wait for Subframe to confirm that SSO is enabled. Then ask a user to select SSO and sign in with their work email address.Contact your Subframe representative if sign-in does not work.