

Create your first project
- Sign up at subframe.com to create your first project.
- Configure your theme with quick presets or customize later in the Theme page.
- Select a default navigation style for your app.
Design your first page
You can create a new page with AI, select a template, or start from scratch.1
Prompt with AI
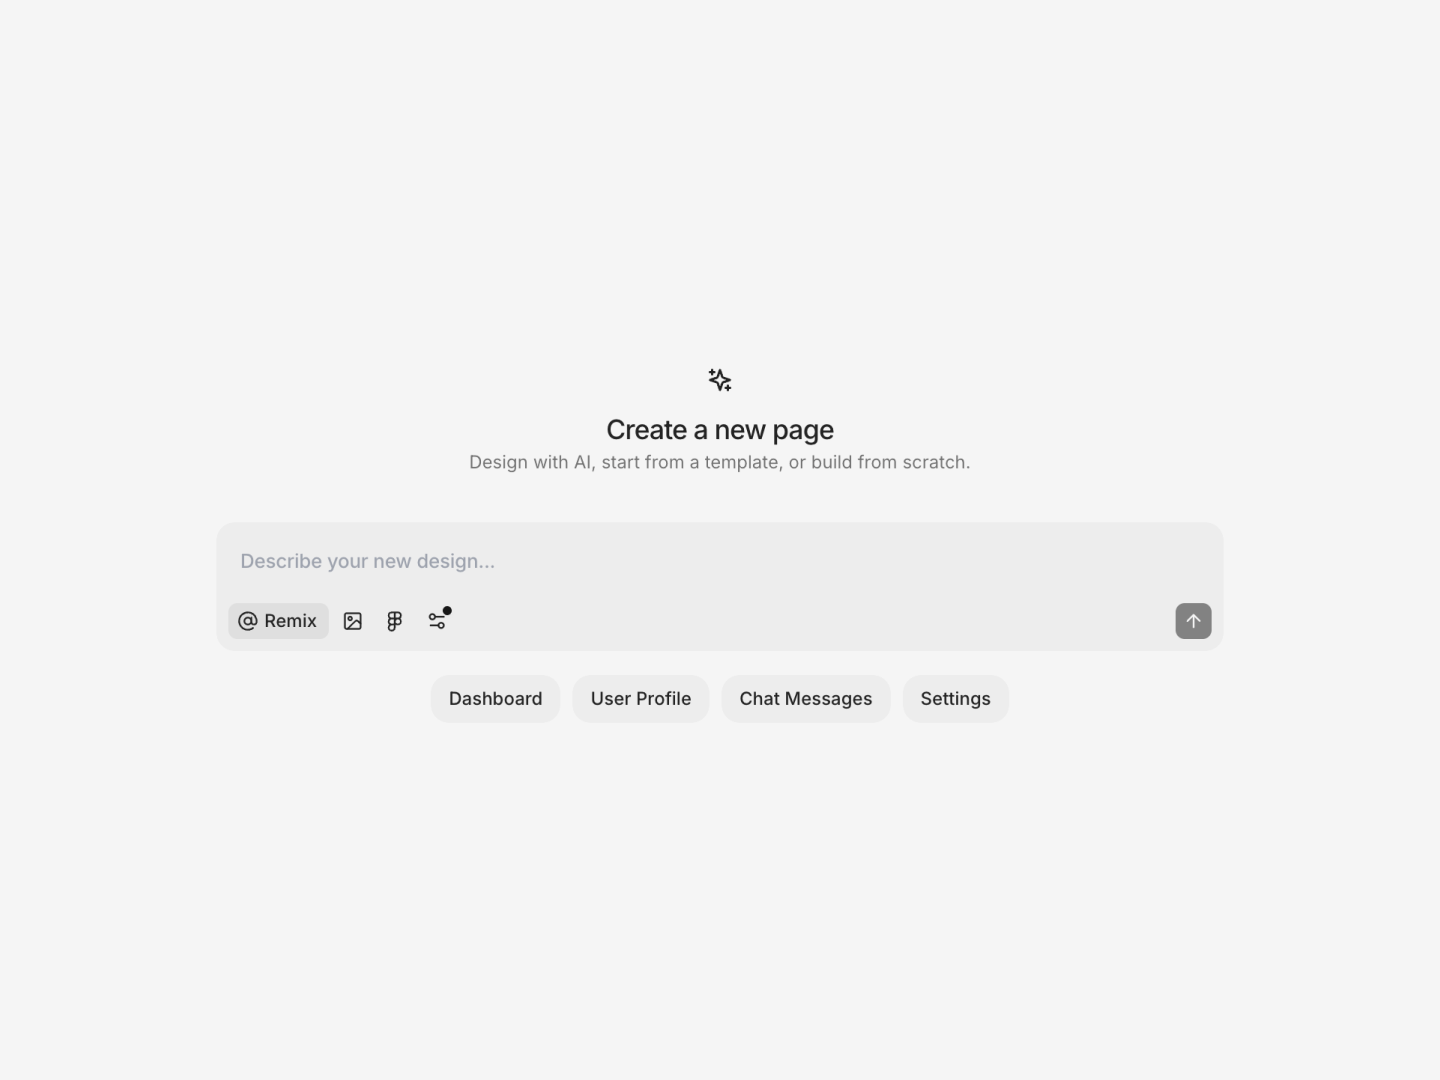
- Go to subframe.com/design/new to open the new page dialog.
- Type a prompt for the page you want to design.
- Submit your prompt to open the page editor and wait for designs to generate.
- Select a variation to preview in the Ask AI panel.
- Click Apply design to add it to the current page.
2
Edit in Design Mode

- Drag-and-drop elements on the page to rearrange.
- Select an element and click the + Insert buttons to add new elements inline.
- Edit styles and properties in the Inspector panel on the right.
- Right-click or press / for contextual edits to a selected element.
Set up your codebase
Next, we’ll create a new project using the Subframe Vite starter kit to implement your design. Open a new folder on your computer using Cursor or your favorite IDE.Build with Subframe MCP
1
Install the MCP server
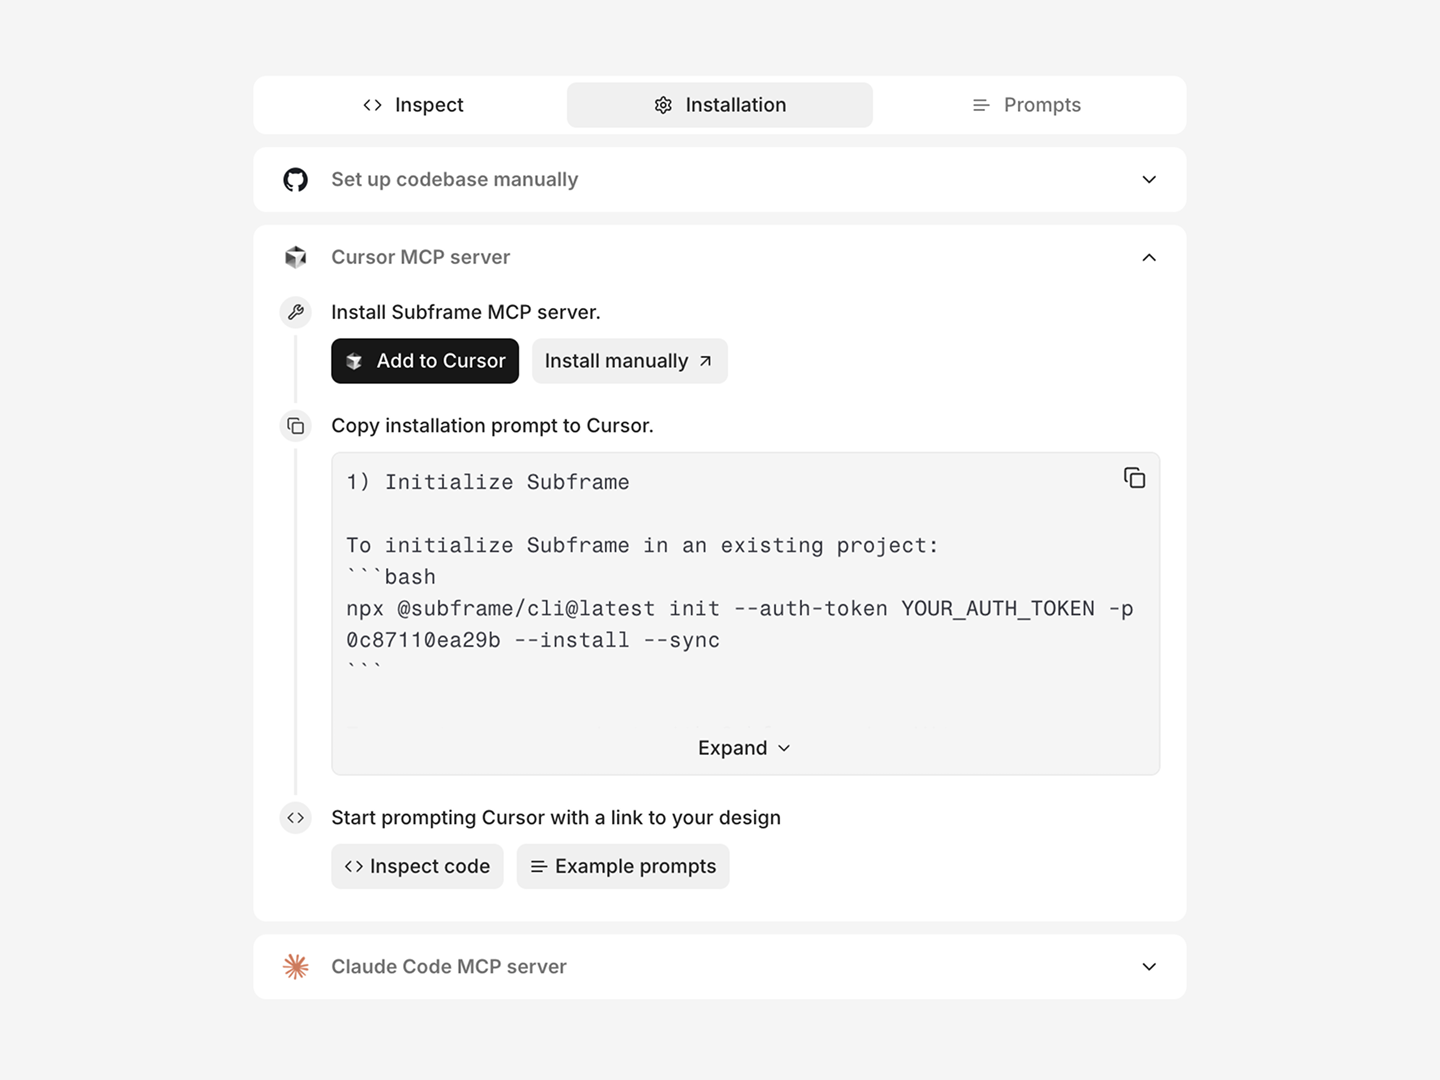
2
Initialize Subframe
3
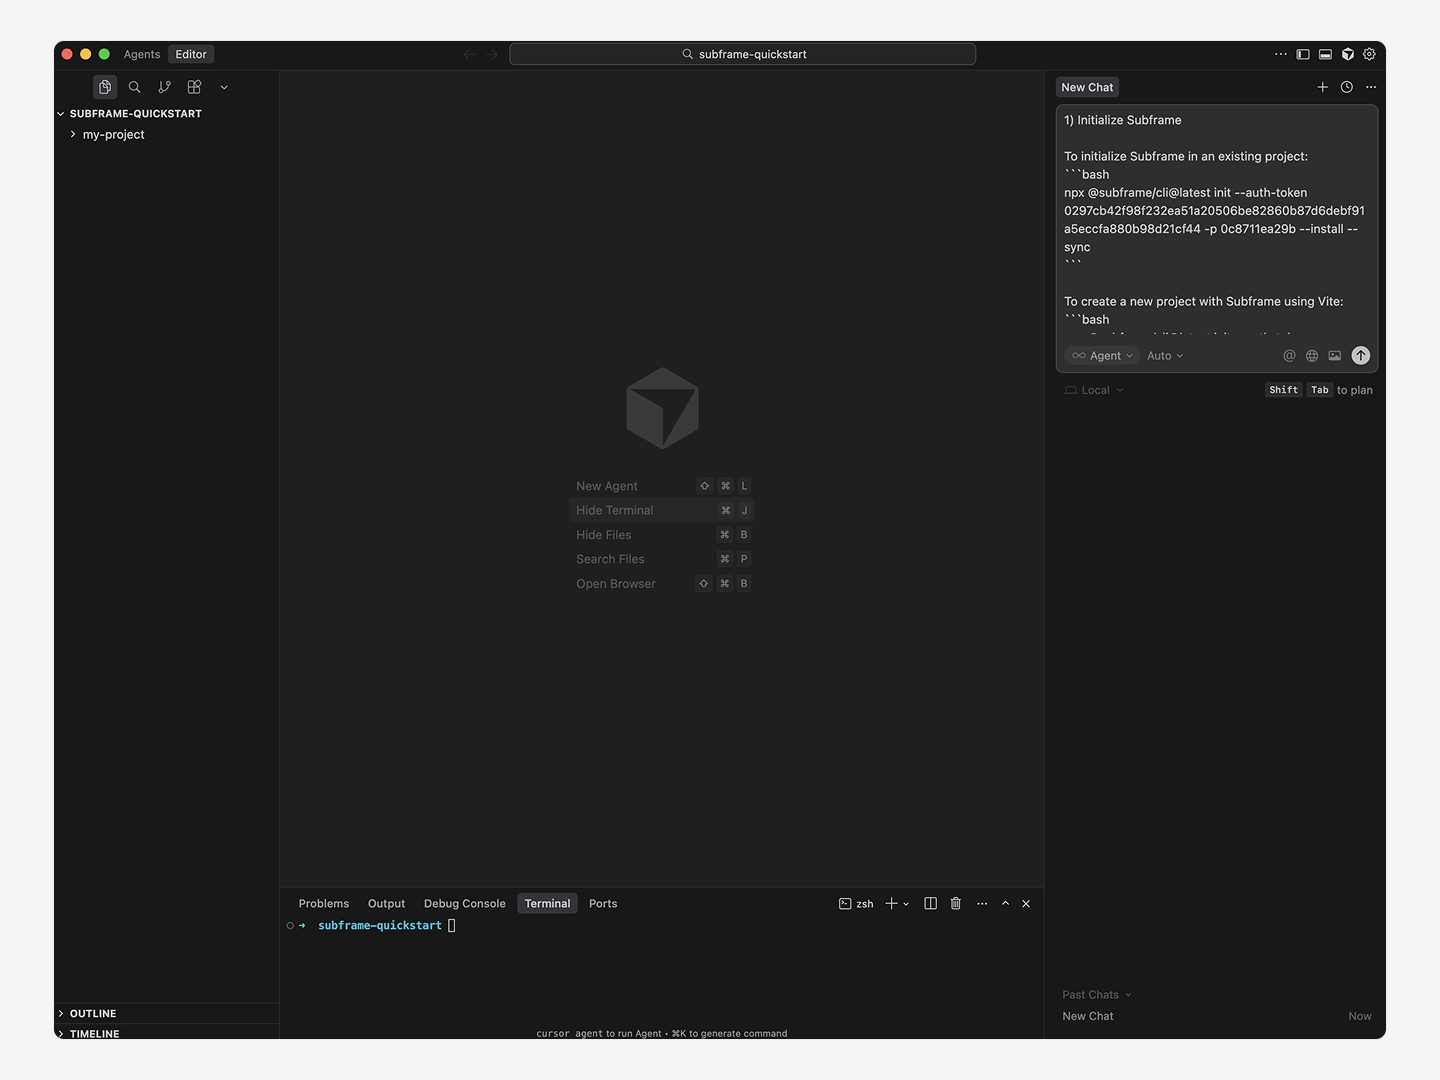
Prompt to implement your design
“Implement the design from this Subframe page [YOUR_PAGE_MCP_LINK]”AI fetches the code via MCP and adds business logic.
4
Start your development server
localhost:3000—your page renders exactly as designed.Or manually copy code
1
Create a new Vite project with CLI
npm
2
Copy your page code
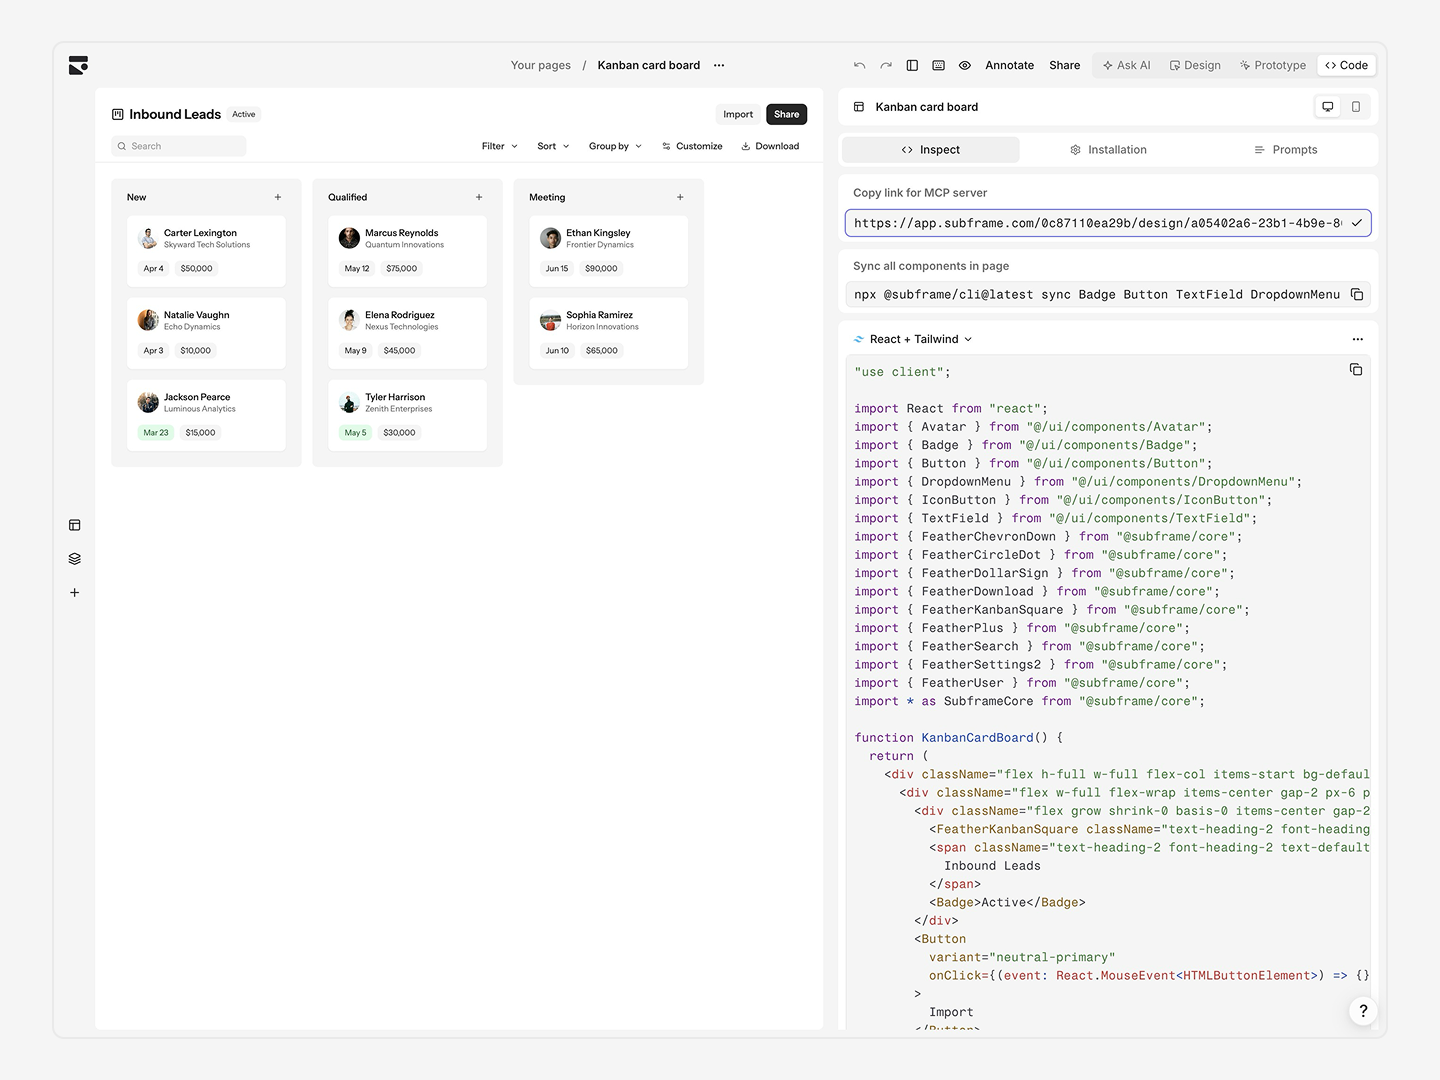
- Switch to Code > Inspect to view React & Tailwind CSS code for your page.
- Click the copy icon in the code viewer.
- Paste into
src/pages/App.tsx
3
Start development
localhost:3000—your page renders exactly as designed.